


When adding or editing items, you can change the appearance of text
Note: Text field formatting is not available for test case and test run steps.
1. Click in the text field to format.
The formatting toolbar is
2. Click a button on the toolbar to apply any formatting or insert content.
Note: You can paste content from external sources, such as Microsoft Word documents and web sites, but some formatting may be changed or removed.
| Button | Use to: |
|---|---|
|
|
Set the font and font size. |
|
|
Apply bold, italic, underline, and strikethrough styles to text. |
|
|
Set the font color and background color. |
|
|
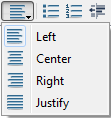
Align content in the field. |
|
|
Add bulleted and numbered lists. |
|
|
Increase or decrease the indent. |
|
|
Insert horizontal rules. |
|
|
Clear all text formatting. |
|
|
Insert and edit images, |
|
|
Insert stamps. See Inserting stamps in text fields. |
|
|
Print the field contents. |
|
|
Check spelling. |
|
|
Open the editor in a new window. This may be helpful if you want more space to view or edit a field with a lot of content. |
Tip: Some formatting buttons are moved to an overflow menu on the toolbar when the Add or Edit dialog box is resized. Click  to view additional options. You can also access these options in the Format menu.
    |

|